Baby Mandrake Crochet: A Step-by-Step Project Guide
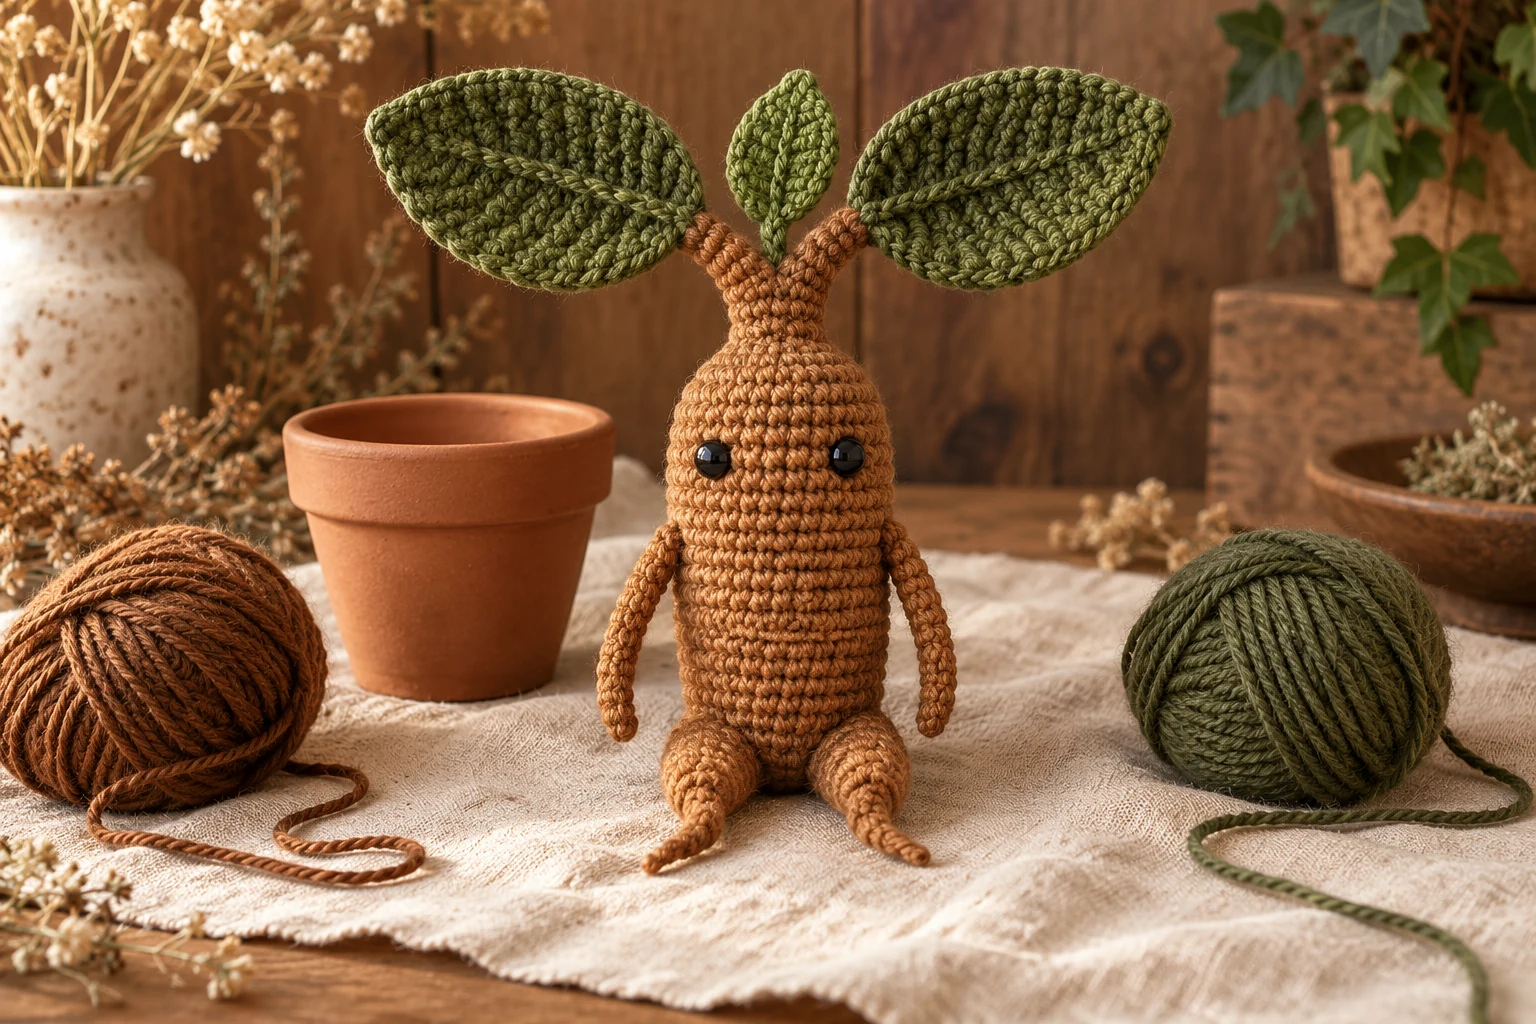
A crochet mandrake takes shape from two root legs, a rounded body, curved arms and a leafy crown. The practical challenge is keeping the pieces and attachment points organised as you work. This guide lays out the sequence, stitch totals and checks to make before closing each section.
The design and underlying pattern are Baby Mandrake by Tatyana Pogosova, Mrs. Crowlet. This is an attributed adaptation of the supplied pattern into a blog companion, not a new design by Crochet Baby Gifts. Find the original Baby Mandrake pattern in the designer’s shop. Keep the original PDF nearby for its photographs and linked demonstrations. We have checked the stitch arithmetic below but have not test-made this project. The illustrations show the intended look, not a guaranteed finished result.
Decide on the finished use first
Treat this version as an adult decorative project. The supplied design includes an internal wire and separate eye components, with a glued-eye option. The name “Baby Mandrake” describes the character; it is not evidence that the finished object is suitable for a baby.
The US Consumer Product Safety Commission’s small-parts guidance covers small components in products intended for children under three, including components that detach during testing. Embroidering the eyes would remove separate plastic eye pieces, but would not establish that the entire project is suitable for a child. This article does not provide a tested child-toy adaptation.
For display, choose a stable pot or shelf away from young children’s reach. Keep the ornament out of a baby’s sleep space.
Choose one documented yarn version
A yarn substitution changes the scale and fabric. Start with a documented version rather than choosing a hook solely from the yarn label.
| Designer’s example | Yarn information in the supplied PDF | Hook | Reported finished height |
|---|---|---|---|
| Small velvet | Micro velvet, 40 g / 148 m, polyester | 1.75 mm | 11.5 cm, about 4.5 in |
| Fine cotton blend | Sport-weight body yarn, 50 g / 160 m; a different yarn for the leaves | 1.75 mm | 12.5 cm, about 4.9 in |
| Washed cotton blend | YarnArt Denim Washed, 50 g / 130 m | 1.75 mm | 13 cm, about 5.1 in |
| Large blanket-yarn version | Blanket yarn, 100 g / 40 m, polyester | 8 mm | 50 cm, about 19.7 in |
These are the designer’s sample results, not size guarantees. The grams and metres describe the yarn presentation, not the amount used by one mandrake. The PDF does not give a measured yarn-consumption figure for each version, so do not read “40 g / 148 m” as a complete shopping quantity.
Before choosing a substitute, compare yarn weights and what they mean. A bigger hook and thicker yarn can make a much larger object; changing just one of them can also change fabric density. Check that the filling is not visible through your fabric before progressing.
What you need
- Brown yarn for the root body, arms and legs, and green yarn for the leaves, matched to your selected version.
- A crochet hook appropriate to that documented version. Keep the same hook for matching pieces unless its instructions specify otherwise.
- Fibre filling, a tapestry needle, scissors and stitch markers.
- Eye components matched to the version and intended decorative use. Follow the designer’s placement guidance; do not assume all eye styles install the same way.
- The internal armature materials specified by the original pattern, if making that version. Plan and handle wire carefully, and keep cut ends contained. This is not a child-safe construction recommendation.
- The original PDF for close-up photographs and the linked demonstrations of joining and finishing.
Record yarn names, colours and hook size before starting. Leave enough matching yarn for any joins and finishing rather than using the last of a colour on a decorative extra.
Stitch key and working method
This pattern uses US crochet terminology.
| Abbreviation | Meaning |
|---|---|
| MR | Magic ring |
| ch | Chain |
| sc | Single crochet |
| inc | Work two single crochets into one stitch |
| dec | Combine two stitches into one single-crochet decrease |
| FLO | Front loop only |
| BLO | Back loop only |
| R | Round |
Work in continuous rounds unless a step says otherwise. Mark the first stitch and move the marker as each round is completed. An invisible decrease works through the front loops of two neighbouring stitches; use the designer’s demonstration if the technique is unfamiliar.
“Repeat four times” means four complete repeats of the sequence. Totals in the tables are the stitches after completing that round. No joining slip stitch or extra chain is added between ordinary spiral rounds.
Make the leaves
Work in green. You need one small leaf and two large leaves.
Small leaf
| Round | Work | End count |
|---|---|---|
| 1 | 6 sc into an MR | 6 |
| 2 | Increase in each stitch | 12 |
| 3 | Repeat (inc, 2 sc) four times | 16 |
| 4–5 | 16 sc in each round | 16 |
| 6 | Decrease eight times | 8 |
Fasten off, keeping a finishing tail. Close and weave in the end using the smooth round-finishing method shown in the original PDF.
Large leaves: make two
| Round | Work | End count |
|---|---|---|
| 1 | 4 sc into an MR | 4 |
| 2 | Increase in each stitch | 8 |
| 3 | Repeat (inc, 1 sc) four times | 12 |
| 4 | Repeat (inc, 1 sc) six times | 18 |
| 5 | 18 sc | 18 |
| 6 | Repeat (inc, 2 sc) six times | 24 |
| 7–9 | 24 sc in each round | 24 |
| 10 | Repeat (dec, 1 sc) eight times | 16 |
| 11 | Decrease eight times | 8 |
Finish one large leaf completely. Keep the working yarn attached to the second large leaf. Join the small leaf to that second large leaf with three single crochets through both pieces, working from inside the small leaf into the large leaf as demonstrated in the PDF. Chain one and finish the yarn. Mark the next stitch on the large leaf for its later attachment.
Check before moving on: you should have one separate large leaf and one joined pair consisting of a large leaf and the small leaf. Do not join all three into one cluster at this stage.
Make two arms
Work in brown.
| Round | Work | End count |
|---|---|---|
| 1 | 5 sc into an MR | 5 |
| 2–3 | 5 sc in each round | 5 |
| 4 | 1 inc, then 4 sc | 6 |
| 5–6 | 6 sc in each round | 6 |
| 7 | 1 inc, then 5 sc | 7 |
| 8 | 1 inc, then 6 sc | 8 |
| 9–11 | 8 sc in each round | 8 |
Finish both arms using the original pattern’s smooth finishing method. Lay them together and compare their round counts and length. Keep their curved orientation in mind for the body join.
Make two legs and join the body
Work in brown.
| Round | Work | End count |
|---|---|---|
| 1 | 5 sc into an MR | 5 |
| 2 | 5 sc | 5 |
| 3 | 1 inc, then 4 sc | 6 |
| 4 | Repeat (inc, 1 sc) three times | 9 |
| 5 | 9 sc | 9 |
| 6 | Repeat (inc, 2 sc) three times | 12 |
| 7 | 12 sc | 12 |
| 8 | Repeat (inc, 3 sc) three times | 15 |
| 9 | 15 sc | 15 |
Finish the first leg and retain its tail for closing the small joining gap. Leave the yarn attached to the second leg.
Body round 10: crochet 15 sc around the second leg, chain three, then work 15 sc around the first leg. Work three sc along the chain to complete the connecting route. Mark the start of the next round. The new body has 36 stitches.
For rounds 11–18, work 36 sc each round. Close any small gap between the legs with the retained tail. Add filling to the legs and begin filling the body as directed by the source.
Attach the arms without losing the count
Arm placement depends on how your spiral has shifted. Find the body centre and use the source’s placement photographs to mark the joining points. Do not assume that a fixed number of stitches from your round marker will place the arms correctly for every maker.
In the designer’s illustrated positioning, round 19 is:
- Work 9 sc along the body.
- Join the first arm with three sc through the arm and body together.
- Work 10 sc along the body.
- Join the second arm with three sc through both pieces.
- Work 11 sc to the round marker.
This gives 36 stitches. The nine-stitch lead-in is the source example, not a universal placement instruction. Check the location and orientation against your piece before making the joins. If your marker has drifted relative to the example, follow the original placement method rather than blindly shifting one segment and changing the total.
Round 20: work 9 sc on the body, five sc around the exposed part of the first arm, 10 sc on the body, five sc around the exposed second arm and 11 sc on the body: 40 stitches.
Fit the internal armature at the stage shown in the original PDF if making its wired decorative version. Consult its photographs for the routing and treatment of the ends rather than improvising from a finished illustration. Once this structure is inside, it may not be readily accessible for inspection.
Shape the upper body
| Round | Work | End count |
|---|---|---|
| 21–24 | 40 sc in each round | 40 |
| 25 | Repeat (dec, 6 sc) five times | 35 |
| 26 | Repeat (dec, 5 sc) five times | 30 |
| 27 | 30 sc | 30 |
| 28 | Repeat (dec, 3 sc) six times | 24 |
| 29 | 24 sc | 24 |
| 30 | Repeat (dec, 2 sc) six times | 18 |
| 31 | Repeat (dec, 1 sc) six times | 12 |
If using backed eye components, install them at the source pattern’s stage before access closes. The PDF places these between body rounds 24 and 25, with six to seven stitches between them. Glued-on eyes use a separate placement method later; do not treat the two instructions as interchangeable.
Continue filling the body in accordance with the pattern. Check the shape from more than one angle. Stop if the filling is visible through the fabric; forcing in more filling does not solve an open fabric.
Divide the crown into two branches
The final 12-stitch opening becomes two smaller branches. Before separating it, identify and mark the source pattern’s midpoint and attachment loops carefully. Its close-up images are particularly useful here.
First branch: eight stitches
Move to the body midpoint following the source’s marker placement, then chain two to establish the split. The first branch uses six body stitches and the two-chain bridge.
On the following round, work six sc and two sc into the back loops of the chain: eight stitches. Retain and mark the unused front loop identified in the original instructions; it is needed to begin the second branch.
On the next round, attach the separate large leaf while crocheting around the eight-stitch opening, working through the leaf and branch as the PDF shows. Add filling as needed before finishing and closing. If you choose the sewn-leaf method below, follow that source option for completing the branch instead of adding both attachment methods.
Second branch: ten stitches
Join brown yarn at the marked unused chain loop. Work two sc into the chain’s front loops, one sc into the adjoining previously used body stitch, six sc around the remaining body section and one sc at the marked midpoint: ten stitches.
Work one further round of ten sc. On the next round, attach the joined leaf pair. The original sequence joins one stitch through the marked large-leaf point, five through the small leaf, then four through the large leaf, for ten attachment stitches in total. Finish and close the end as demonstrated in the PDF.
Numbering note: the source switches numbering conventions between the branches. This guide names the branch stages separately so that “round 1” of a branch is not confused with round 1 of the whole mandrake.
Finish the leaves and face
The original pattern offers sewing the leaves on as an alternative to joining them while crocheting. Position the relevant leaf at its branch opening, take stitches between the leaf edge and the branch from inside the opening, and continue around as shown in the source demonstration. Make the second attachment using the same chosen construction method.
For its glued-eye option, the designer first checks the proposed position without adhesive, marks the position temporarily and only then attaches the components. Follow the adhesive manufacturer’s directions for compatibility and full curing rather than treating a general waiting time as suitable for every glue. Remove all temporary positioning pins. This remains a decorative version, not an infant toy.
The optional lower-body shaping uses a strong thread passed through the lower body and drawn up toward the back to create a small indentation. Consult the PDF for the exact needle path and anchor points. This detail is optional and is separate from the structural leg join.
Troubleshooting at the points that matter
| What you notice | What to check before continuing |
|---|---|
| The second arm looks misplaced | Compare the body centre, arm orientation and spiral shift with the source placement images. |
| The count grows after attaching arms | Distinguish stitches already used in the join from stitches around the exposed arm edge. |
| One leg or arm is longer | Compare round counts, yarn and hook before trying to stretch one piece into shape. |
| Filling shows | Inspect fabric density and filling quantity. A different hook/yarn combination may require remaking the piece. |
| The crown split is confusing | Locate the retained chain loops and markers before starting the second branch. |
| The finished size differs from the example | Compare the actual yarn, hook and tension; the source samples are not guaranteed dimensions. |
Count at the end of each shaping round, while the last change is still easy to find. Taking a quick progress picture before a join can help you return to the same placement if you pause the project.
Display and keep a making record
A plain pot lets the leaves and root shape be the focus. For an autumn look, choose warm brown with olive; for a quieter botanical look, try cocoa with moss. These are styling suggestions, not verified branded yarn matches or instructions to change the designer’s construction.
Keep a small making record with the finished decoration: pattern designer and version, yarns, hook, finished height, filling, wire/eye construction and care information. Do not assume a finished piece is machine washable just because its yarn is; the filling, armature, eye attachment and adhesives also matter.
For another botanical project to plan, see the sunflower bunny project guide. For packaging inspiration, see presenting a handmade crochet gift, adapting the presentation to an adult decorative item rather than treating this mandrake as a baby gift.
Is this a free original pattern by Crochet Baby Gifts?
No. Mrs. Crowlet is the designer. This page is an attributed project companion based on the PDF supplied for the article. The original source contains the designer’s photographs and demonstrations. We have not test-made this adaptation.
Can I finish it in an afternoon?
We have no measured making time for this project. Yarn, experience, assembly and any changes all affect the time needed. Plan extra time for checking the crown split and the final attachments rather than promising a fixed completion time.
Can I use the same instructions with any yarn?
A different yarn changes both size and fabric, and may change the practical assembly decisions. Start from one of the source’s documented examples and treat further substitutions as experiments. Keep the designer’s PDF beside your work when making the joins.